The easiest way to hold ADA and earn staking rewards every 5 days
Published on 27 March 2022
One of the great attractions of Proof of Stake (PoS) is the possibility of holding assets and earning rewards through delegation to validating network nodes.
Cardano was born from scratch as a Proof of Stake project. It is considered a third generation blockchain. From one of its updates, it enabled the possibility of obtaining rewards through delegation.
It is extremely attractive that to carry out this delegation: the holders do not lose custody of their tokens. They can keep them in their wallet and delegate to the chosen node. This delegation is taken as a vote of confidence in the chosen server because the increased volume of delegation allows the server to gain confidence in the decentralized structure of the Cardano Network.
There are different wallets to perform this task, but today we are going to focus on Yoroi, a light wallet that can be installed as a browser extension. It allows you to send and receive coins, choose a pool to delegate and perform the corresponding delegation. It will also allow you to view the balances of our coins and the rewards earned in each epoch. You can set up a Yoroi Spending password to protect yout wallet.
Installing Yoroi Wallet
To install Yoroi wallet, it will be necessary to go to the Chrome Web Store with the browser and install the extension. It is currently available for Chrome, Edge, Brave, Firefox, Android, and iOS.
Yoroi can be used on Windows, Linux or Mac platforms, as well as Android or iOS mobiles.
To avoid downloading the wrong extension and to make sure that we are downloading the official version, it is convenient to go to the official page https://yoroi-wallet.com and look for the download options from there.
Despite being a wallet that supports both Cardano and Ergo, the Cardano ecosystem is widely used.
Yoroi is a free and open source wallet.
Once the extension is downloaded, it will appear in the upper right part of the browser. Like all extensions, it may always be visible or it may be displayed in the extensions container tab.
At first, the Wallet will ask you to set the operation language. You have many options here. After that, you should accept the terms and conditions to continue.
Then it will ask if you want to enable Cardano Payment URLs, a system to receive payment faster and easier. You can choose any of the options, since it can be changed from the settings tab later on. It is preferable to skip this option for now and then enable it in the future if necessary.
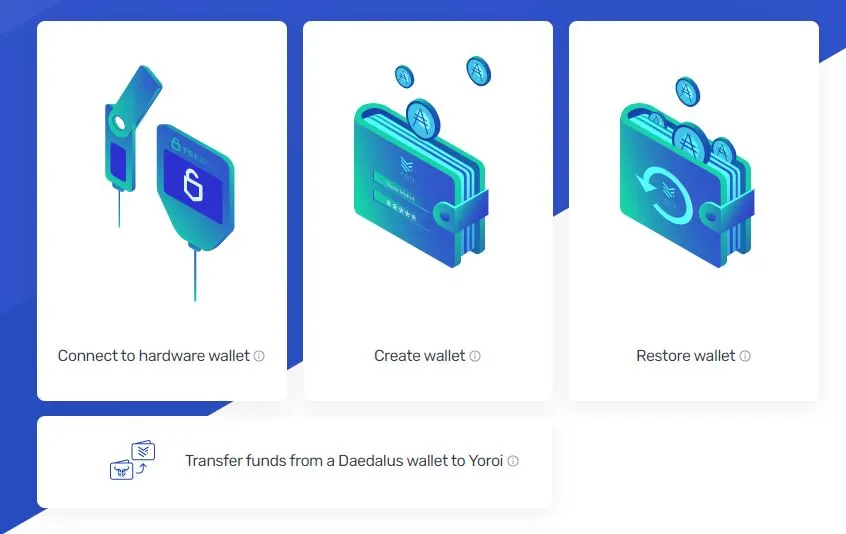
Then you will have three options: Connect the Yoroi Wallet to a hardware wallet, install a new wallet or import an existing wallet. It will also give you the option to import funds from a Daedalus wallet.
If your idea is to create a new wallet, you will choose the corresponding option. The next step will be to determine if its use will be in the Cardano or Ergo network. We will choose Cardano.
You must then choose “Create Wallet” to advance in the creation. (The Paper Waller option will not be described here.)
Yoroi Spending Password
You must write the Wallet Name that will be a name to identify the wallet in your installation and a “Yoroi wallet spending password” that will be the password to sign the transactions.
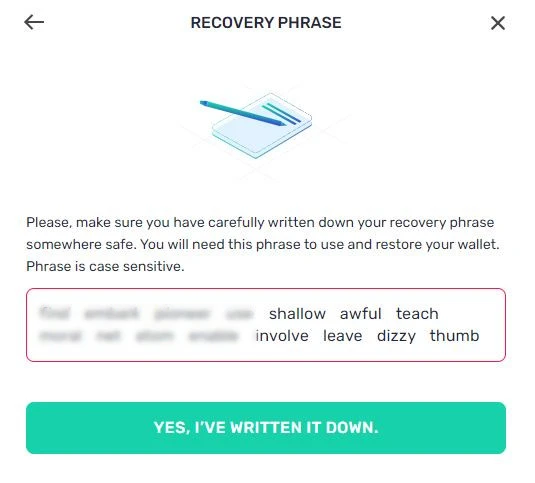
The next screen will provide you the 15-word seed phrase, which will be the only way to restore the wallet on another device.
You must keep these words in a safe and secret place to have access to our funds again in the future.
As a confirmation method, it will ask to enter the 15 words in the corresponding order to ensure that we have written them correctly. This is a very easy to use drag and drop mechanism to sort the 15 words in the corresponding box.
You will confirm and you will be able to access the interface of our new wallet.
Going through the wallet
Every time you want to access our Yoroi Wallet you must click on the browser extension. The wallet will open without asking for a password. But only information can be observed. Every time we execute an operation we must sign with the password created at the beginning of the installation process.
In the interface you will observe the following tabs:
DASHBOARD
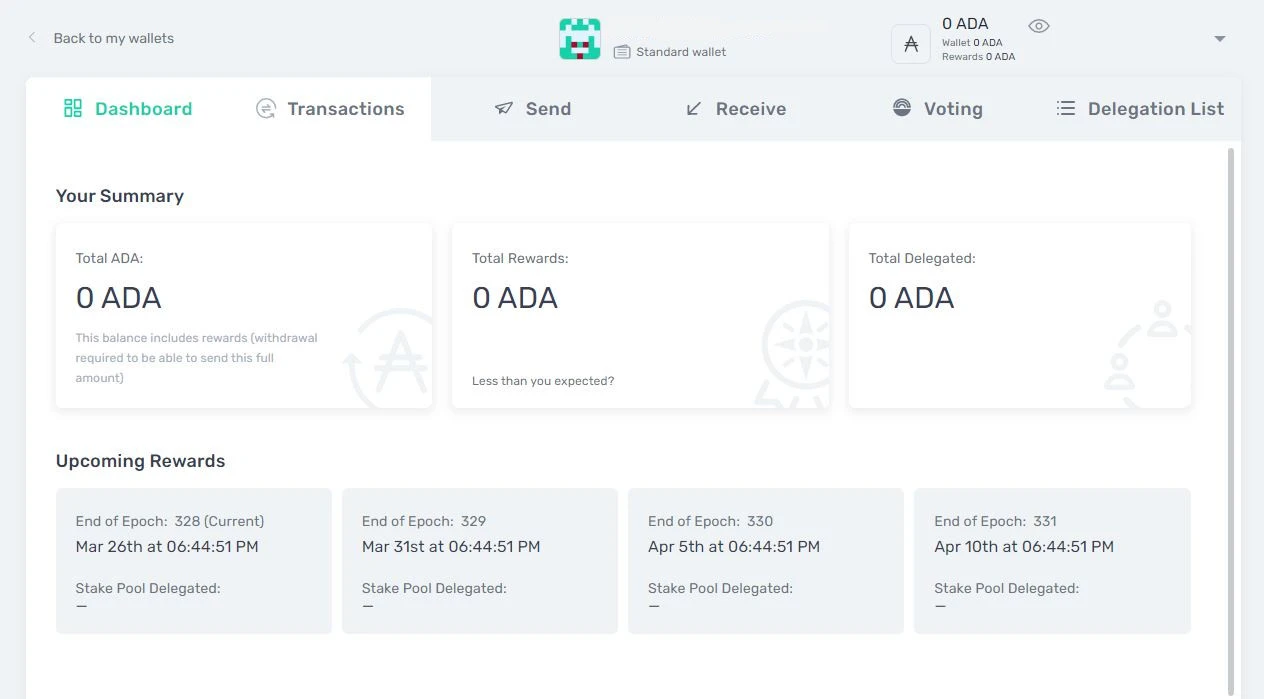
Here it shows the total of ADA existing in the wallet, the rewards earned by staking and the funds delegated in a pool.
TRANSACTIONS
Here it shows a history of the past transactions.
SEND
Tab to send funds to another wallet. You must add the destination address, the amount of ADA to send, a description and a Memo if necessary. To execute a transfer of funds it will be necessary to sign with the password.
RECEIVE
Tab to receive funds in our wallet. Here we will see an address and a QR code. Either option can be copied or scanned to send funds from another wallet or from an exchange using the Cardano Network.
Every time we manage a new reception, Yoroi will generate a new reception address for us. Let’s not worry. The funds will always arrive at the same place even if Yoroi provides us with different addresses.
We will also be able to observe the temporary data of the current epoch and the following ones.
VOTING
From here we can participate in the decisions of the Catalyst project. If you want to learn more about ada catalyst voting rewards please click here.
DELEGATION LIST
From here we can choose the pool to delegate the funds and receive staking rewards. The Yoroi wallet staking rewards option is highly recommended by the community.
On the left sector of the wallet we will have a series of configuration icons.
One installation, several wallets
One of Yoroi’s features is the ability to have multiple wallets available in a single browser installation. To activate this option, we can go to the top icon on the left bar and execute “Add new wallet” there. Then we will follow the wallet creation or import process as described above to create the first wallet.
Delegate funds to earn staking rewards
From the Delegation List tab, it will be possible to delegate funds to earn rewards. At the time of executing this operation, all the existing ADA in the wallet will be delegated. It is not possible to only delegate a part.
Let us remember that the custody of the funds will continue to be our responsibility in Yoroi, even if we delegate to a pool.
Likewise, the funds received every 5 days by staking will be automatically incorporated into our funds, generating compound interest.
CHOOSE A VALIDATION POOL
From the “Delegation List” tab we can search a long list of pools to delegate our coins. It is important to choose a pool with a good reputation within the network to guarantee the payment of rewards.
Choosing a pool that has network issues or is saturated could mean earning fewer rewards and we could even be penalized for delegating there.
Each pool randomly receives within the network the possibility of signing blocks of the cardano blockchain and is rewarded for it. At the end of each epoch, each pool distributes the rewards received proportionally in the corresponding wallets.
The epoch is a period of 5 days that groups the generation of a certain number of blocks.
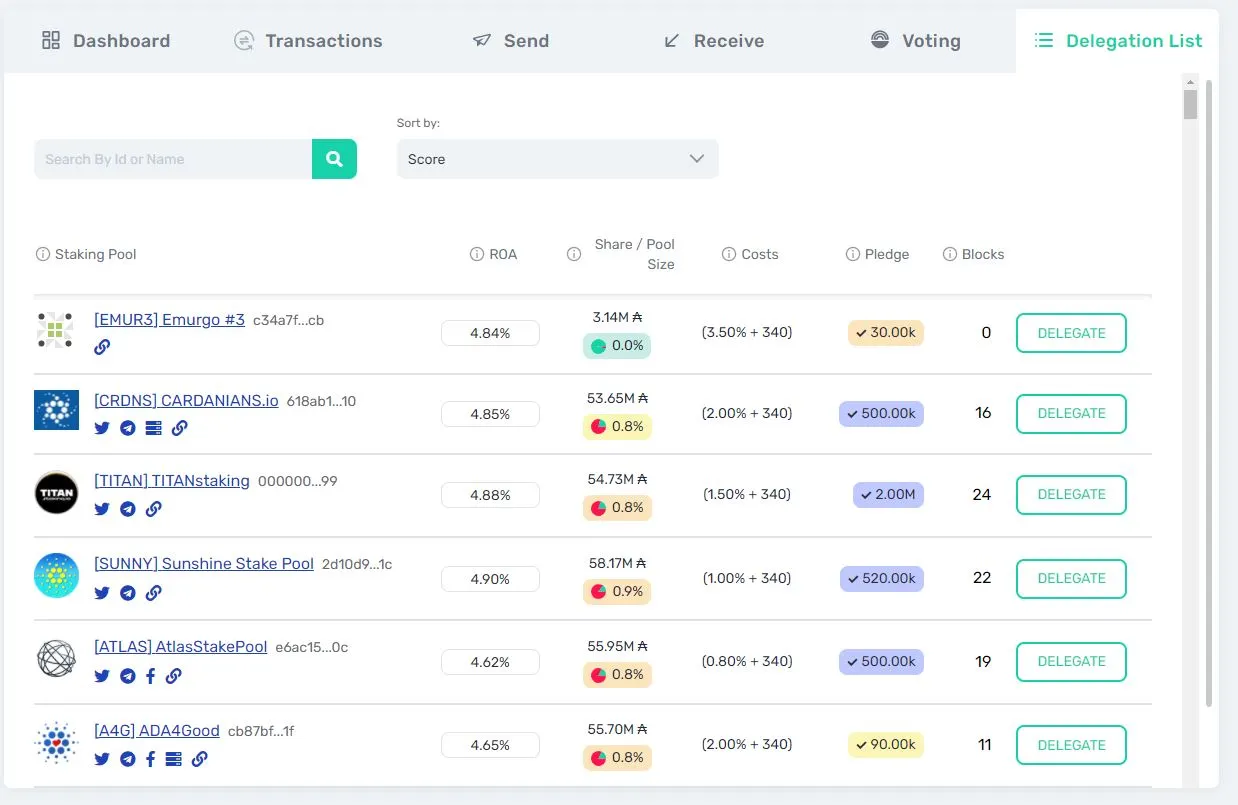
One of the first considerations when choosing a pool is to avoid those that are close to saturation, to see the percentage of rewards that it pays and the amount of funds that the operator has deposited in his own pool.
When operating in the delegation tab, in the first column we can see the name of each pool and its ticker.
In the second column the ROA (Return of ADA). That is the annual percentage that this pool will pay to its delegators.
In the third we will see the amount of ADA that pool has received in delegations, and the percentage it represents in all pools in the network (Share).
In the fourth column are the maintenance and management costs of the pool. This is a fixed cost plus a percentage amount of the rewards received.
The fifth column is the pledge. This is the amount of ADA that the owner has delegated to their own pool. A high value will show a high commitment of the operator with his own infrastructure.
The sixth column shows the number of blocks a pool has signed at the current epoch.
Finally the delegation button.
After doing a research of the pools and choosing a preferred one, we can delegate all the existing ADA in the wallet.
To see the complete list and observe additional statistics we can access adapools.org

Waiting time for payments
Every time we delegate ADA to a pool, we will have to wait a while to receive the rewards. This will start running from the start of the next epoch.
The first rewards will arrive at the end of the first 3 full epochs. This is a maturation process that can take between 15 and 20 days.
For example, if we delegate 1 day before the start of the new epoch, the maturation process will last 16 days. If we do it 4 days before, it will last 19 days.
Every time we add funds to the wallet, those new funds must go through the same maturation process until they generate new rewards.
Every time an epoch starts, the network will take a snapshot of the balance of the wallet that is delegated and compute them to calculate the rewards.
Suppose today is March 23 and we start a delegation. The current epoch is 328 which ends on March 26.
During epoch 329 ending March 31 the network will take a snapshot of the coins delegated during the previous epoch.
During epoch 330 ending April 5, the snapshot from the previous epoch is used.
During epoch 331, the rewards that will be distributed at the end of the epoch on April 10 are calculated.
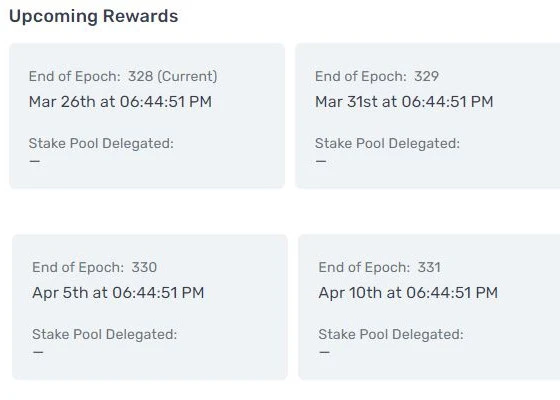
The rewards are distributed at the end of each epoch proportionally to the number of coins delegated and the performance that the pool has had in that period. On average, the annual return should be around 5%.
Published on 27 March 2022